foodie 1


Friday, April 27, 2012

Pasta Carbonara

This is another recipe (like Wednesday's risotto) that I can't believe I haven't posted to the blog yet.  This is easily my favorite pasta dish to make at home.  It's quick, it's easy, it's made out of common pantry ingredients AND it has bacon in it.  What's not to love?

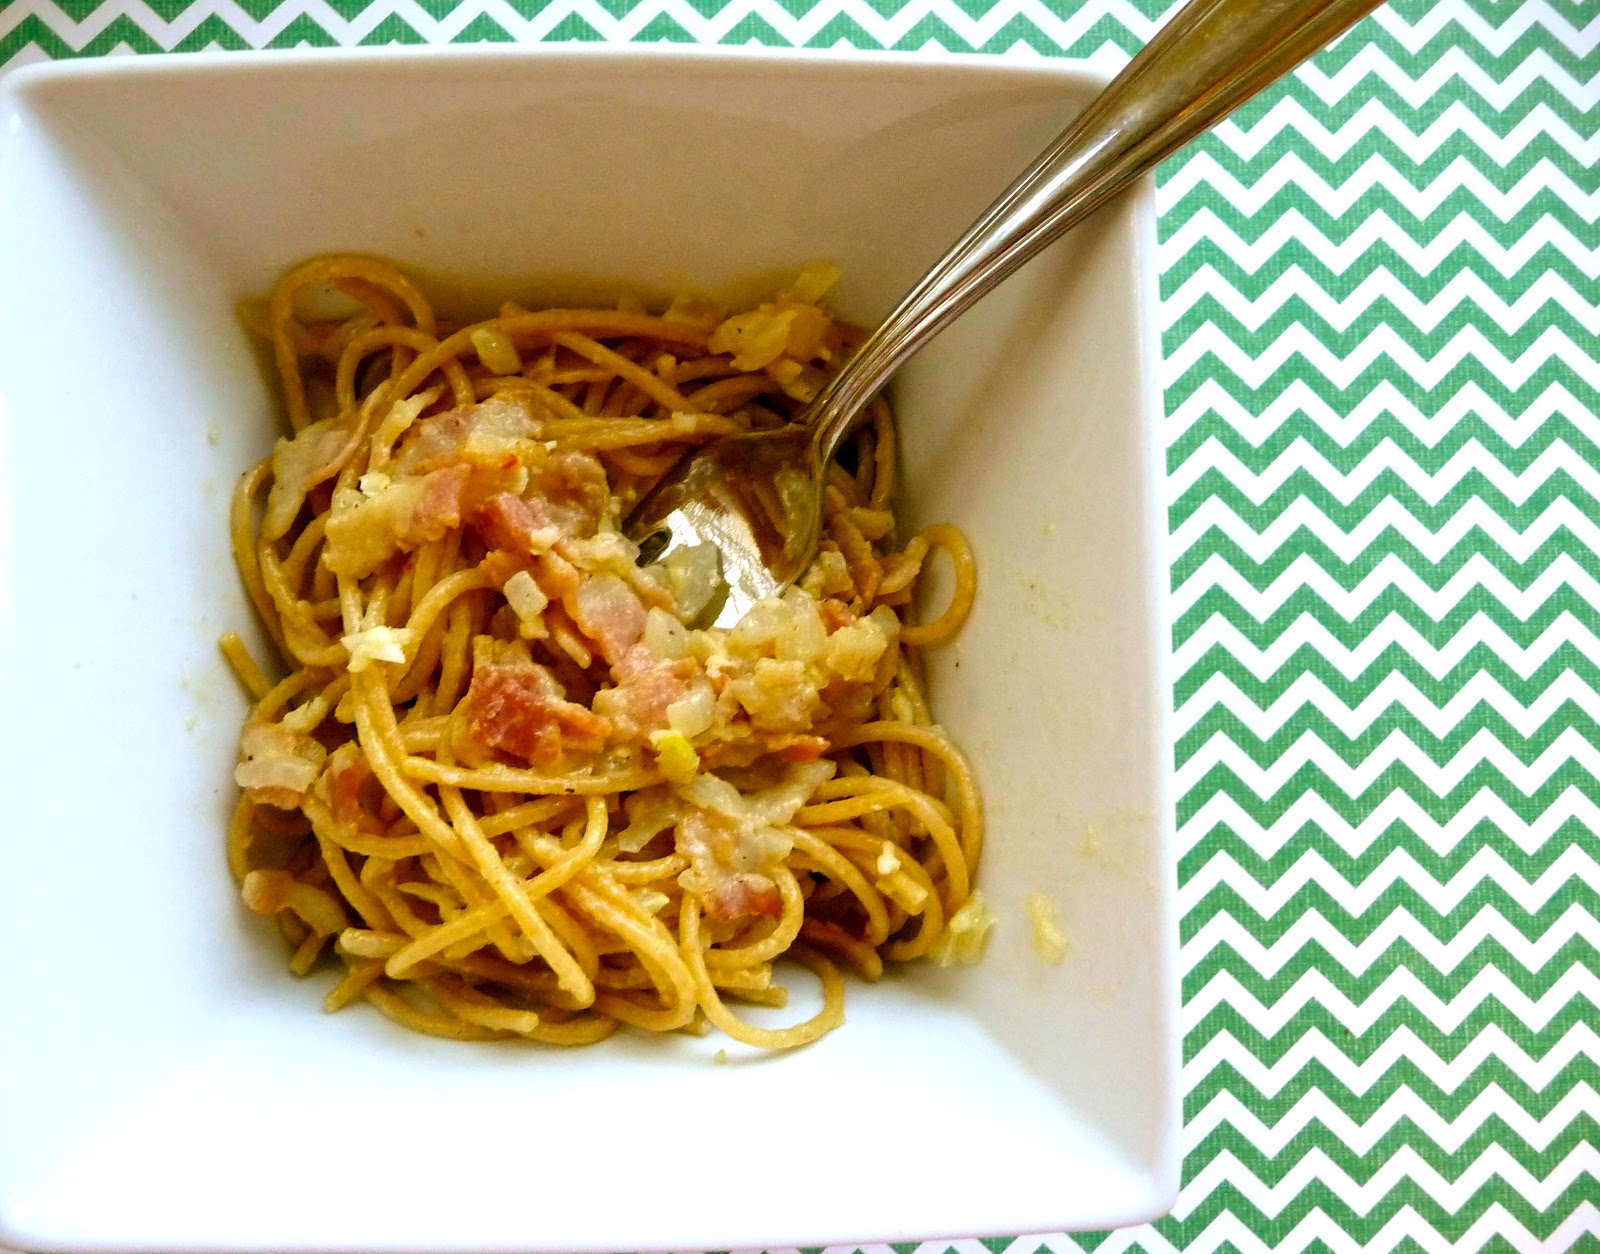
Pasta Carbonara is always a fallback option for us since we always have bacon in the freezer.  It just takes twenty minutes or so under cold water and it's defrosted and ready to go.  It's definitely a comfort food option for us as well.  The creamy sauce made when the egg is gently warmed and combines with the cheese is so deliciously salty from the parmesan and the smokiness from the bacon, there's no horrible day that this pasta won't improve.  Do make sure you temper the egg and cheese sauce slowly and carefully.  I've done it too fast before and you end up with a sauce made of scrambled egg bits and that's not good.  I've been making it from this base recipe for over five years now, maybe even longer.  I changed up the recipe a bit, always adding in onions and have added in either spinach or mushrooms in the past as well.  I hope that you find that this recipe becomes a staple in your kitchen as well.


Pasta Carbonara
serves 4, adapted from Rachael Ray/The Food Network

Ingredients:
Salt
1 pound pasta, I usually use spaghetti
1/3 pound bacon, chopped
1 medium onion, chopped
4 cloves garlic, minced
1/4 teaspoon crushed red pepper flakes
1/2 cup dry white wine
2 large egg yolks
3 tablespoons grated Parmigiano Reggiano, plus more, for topping
black pepper

Directions:
  • Place a large pot of water on the stove to boil. When water is boiling, add salt and pasta and cook to al dente.  When pasta is done don't forget to save 1/2 cup pasta water.
  • While pasta cooks, heat large skillet over medium heat. Saute bacon until brown and crispy, 3 to 5 minutes. 
  • Add onion and cook until softened, about 5 minutes.  
  • Add garlic and crushed pepper flake, saute 2 minutes. 
  • Add wine to the pan and reduce liquid by half, 2 minutes.
  • Beat together egg yolks, cheese, and while whisking vigorously, stir in a ladle of the boiling pasta water.
  • Drain pasta -- don't forget to reserve about 1/2 cup of pasta water (I usually forget this, hence my repeated reminders!).  Add pasta to pan with bacon mixture.  Toss pasta with bacon mixture, then add egg mixture and toss 1 minute, then remove from heat. Continue to toss, and adding reserved pasta water as necessary to loosen sauce, until sauce is coating the pasta. Add pepper to taste and salt, if necessary.  
  • Serve with extra cheese, for topping.

Wednesday, April 25, 2012

Parmesan Risotto with Roasted Vegetables

This is one of our standard recipes, it makes an appearance on our menu at least once a month, if not every other week.  I can't believe I haven't posted it to the blog before now, but we're about to fix that!  This recipe is from The Best Light Recipe by America's Test Kitchen/Cook's Illustrated.  It never fails us and it's incredibly versatile.  We typically make up the base parmesan recipe, but we will throw in other cheeses if we have those lying around.  One of our favorite variations is to add in some of our homemade mozzarella cheese at the end instead of the parmesan.  Another great version is saffron risotto, which turns out a beautiful golden color (second picture), and I've included the directions for it as well.

We top this with any number of toppings -- seen here is roasted brussel sprouts, but any roasted veggie works just as well, asparagus, carrots, cauliflower, broccoli, butternut squash.  Sauteed zucchini or summer squash make a great summer meal as does grilled shrimp or chicken.  Halved cherry tomatoes or diced regular sized tomatoes, and chopped basil fresh from the garden with mozzarella makes a great caprese version.  Risotto can be a great vehicle for leftovers as well.  Mix in some leftover steak cut into bite-sized pieces, veggies, pork chops, really anything!


Parmesan Risotto
serves 6

Ingredients:
4 cups chicken broth
3 cups water
1 medium onion, chopped
1 tablespoon olive oil
salt
2 cups arborio rice
1 cup dry white wine
2 ounces grated parmesan cheese (about 1 cup)
1 tablespoon unsalted butter
ground black pepper

Directions:
  • In an electric kettle heat the chicken broth and water to boiling.
  • In a medium saucepan, heat the olive oil and add the onion and 1/2 teaspoon salt.  Cook over medium heat until the onion is softened.
  • Add the rice, stirring to coat all pieces with the oil.  Toast the grains until the edges start to turn transparent, about 4 minutes.  Stir in the wine and cook until completely absorbed, about 2 minutes.
  • Stir in 3 cups of the broth/water mixture.  Stir occasionally, until the liquid is absorbed, 10 to 12 minutes.
  • Continue to cook the rice, adding 1/2 cup of the broth/water mixture at a time and cooking until completely absorbed, about every 4 minutes.  Taste the rice starting after 10 minutes, cooking until al dente, with just some bite in the center.
  • Add in the butter, cheese and then season with salt and pepper to taste.  


Variation:  Saffron Risotto
  • Follow the recipe but omit the parmesan and add 1/8 teaspoon of saffron threads when you add the rice to the onions/oil.  

Monday, April 23, 2012

Cheesy Potato Soup with Mini Ham Sandwiches

This seems like a perfect recipe for a day like today.  The weather forecast calls for day of drenching rain and this is a soup and sandwich pairing that is warm and comforting.  It comes together quick enough for a weeknight and tastes great.  The soup is creamy and cheesy, while still being low fat -- you can't get much better than that!  Definitely use small red potatoes in this dish; they are waxier and won't turn to mush in the soup.  


The mini ham sandwiches that pair with it are cute (who doesn't like a mini sandwich?!?) and tasty.  The chive mayo is the element that really takes them to the next level.  It's a simple step that adds a ton of flavor and makes them not just a typical-thrown-together-with-stuff-in-the-fridge-kind-of sandwich.  I didn't really make any changes to the recipe and the only thing I might change in the future is throwing in a bit of smoked paprika, both in the soup and in the mayo for the sandwiches.  I think it would give a nice smoky hit to both elements and tie them together a bit more. 


Cheesy Potato Soup with Mini Ham Sandwiches
from Cooking Light, January 2012
serves 4


Ingredients:

1 tablespoon butter
1 cup chopped onion
2 1/2 tablespoons flour
3 cups chopped red potato (about 1 pound)
1 1/4 cups 1% milk
1 1/4 cup chicken broth
1/2 cup shredded 2% cheddar cheese
1/8 teaspoon ground red pepper
2 tablespoons chopped green onion
1 tablespoon minced chives
2 tablespoons mayonnaise
1 teaspoon Dijon mustard
8 slider rolls
4 ounces thinly sliced ham


Directions:
  • Melt butter in a medium pot over medium-high heat. Add onion and sauté 5 minutes or until onion is tender. Preheat oven to 400 degrees.
  • Sprinkle onion with flour; cook 1 minute, stirring constantly. 
  • Add potato, milk and broth to pan; bring to a boil. Cover, reduce heat, and simmer 10 minutes. 
  • While soup is simmering, start on the sandwiches.  Combine chives, mayo and dijon mustard.  Place the slider rolls, cut sides up, on a baking sheet and bake for 5 minutes, until toasty and golden brown.  
  • When the soup has finished simmering, add the shredded cheese and ground red pepper; cook 2 minutes or until cheese melts, stirring frequently. 
  • Once the rolls come out of the ove, spread cut sides with the mayo mixture.  Divide ham even among rolls.
  • Top each serving of soup with 1 1/2 teaspoons chopped green onions, serve.  

Friday, April 20, 2012

Christmas Spiced Beer

This is a write up of an old beer I made way back when I was a novice brewer. The kit, like most of my kits, came from Northern Brewer. I actually brewed this way back in 2010, so the bottles I still have are well aged. The brewing instructions can be found here.

Ingredients:
1 lb English Dark Crystal
6.3 lbs Gold LME
1 oz US Goldings Hops
0.5 oz Mulling spices

Yeast:
Wyest 1728 Scottish Ale


As you can see, the beer pours a deep amber color. The beer is a decent 6.5% ABV. An off-white head forms, but it dissipates quickly.  Initially the flavor of the beer was heavily skewed towards clove. The kit came with a pre-mixed spice package that was basically a tbsp or so of mulling spices. I have always found the clove to be overpowering, and sampling the beer after almost 2 years of resting in bottles it still has a very strong clove aroma and taste. Amy loves it, but it is not one of my favorite brews. In the future I'd make my own spice mixture, and skew towards cinnamon, some nutmeg, allspice berries, orange peel, dried cranberries, and maybe a clove or two. I also think testing the spice mixture out by making a batch of mulled cider with it beforehand would be beneficial. I've never done it, but basically you can just make a tincture using a tea infuser and a base beer, then use that to scale up to the full 5 gallon batch of beer.

In short, the beer is good as made directly from the kit if you like clove. If not, I would order a basic Scotch Ale kit and add in your own spice mixture at the end of the boil. Definitely a good base for playing around and trying out your own spice mixtures.

Cheers!

Wednesday, April 18, 2012

Spanish Shrimp with Sunset Orzo

Shrimp is showing up more and more in our weekly menu plan.  I've talked about my new-ness to seafood before, but shrimp has broken through and made themselves a staple in our house.  There's always a bag in the freezer and since they are quick to defrost, they make for great weeknight meals.  I will eat them, but I'm not comfortable enough with them yet to peel and devein them.  I don't like seeing their legs, that still makes me feel weird, so I leave that up to Zach.  ;-)


This meal was a great weeknight meal -- fast and flavorful.  It also made good leftovers for lunches the next day.  I left out the peas since I don't like them, but I did double up on the red pepper, using one large one instead of a small.  I think it would be great with some frozen diced carrots thrown in in place of the peas as well, or frozen corn too.  Both would work well with the 'color scheme' of the dish too, matching the 'sunset' theme.  I loved the use of chorizo in the dish, it gave a nice warm and spicy flavor to each bite.  


I made a few other changes as well, either with the aim of cutting fat/calories or in simplifying the steps/decreasing the dishes needed.  I love Rachael Ray's recipes but man does she use a lot of pots, pans and dishes!  I guess it's because she doesn't have to wash them up herself, and although neither do I (Zach is the main dishwasher in our house), I still cut out steps when I can.  I decreased the chorizo from 1/3 pound to 1/4 pound and also cut out the oil altogether.  I didn't find that that a fatty sausage like chorizo needs oil to brown, as soon as it gets warmed up and cooking it starts rendering fat into the pan, so why start with oil if you don't need to?  I also changed the steeping method for the saffron and chicken broth (why get another pot dirty when the microwave works just as well) and the cooking method for the shrimp (again, why get out another skillet, just throw them in with the veggies!).  I have a feeling this meal will be one more reason for shrimp to keep popping up on our weekly menus!


Spanish Shrimp with Spanish Orzo
serves 4
adapted from EveryDay with Rachael Ray, April 2009

Ingredients:
Salt
8 ounces orzo pasta
2 pinches saffron threads
1 cup chicken broth
1 tablespoon olive oil
1/4 pound Spanish chorizo, chopped
1 onion, chopped
1 large red bell pepper, chopped
2 cloves garlic, finely chopped
1 teaspoon ground turmeric
1 pound medium shrimp, peeled and deveined

1 teaspoon smoked paprika
1/4 cup parsley, chopped
Juice of 1/2 lemon


Directions:
  • Bring a large pot of water to a boil, salt it, add the orzo and cook until just al dente. Drain and cover.
  • While the water comes to a boil, steep the saffron in the chicken broth.  Pour the chicken broth into a glass measuring up and add the saffron.  Heat in the microwave for 1-2 minutes and let steep until needed.  
  • Heat a large non-stick skillet over medium heat. Add the chorizo and cook until browned, about 2 minutes. Add the onion, bell pepper, garlic and turmeric and cook for 5 minutes. 
  • Add the shrimp to the vegetable/chorizo mixture and cook until pink and firm, 2 to 3 minutes. 
  • Pour the saffron broth over the shrimp, chorizo and vegetables. Add the paprika and cooked orzo and toss for 2 minutes. 
  • Serve in bowls, topping with the parsley and lemon juice. 


Monday, April 16, 2012

Coconut Shrimp: Secret Recipe Club

It's time for another Secret Recipe Club post!  This month I was super excited when I started browsing through the blog I was assigned.  I got Savor the Senses, a blog written by Jenny who is a chef at a Morimoto restaurant in Hawaii!  How cool is that!  There were so many great recipes that piqued my interest.  Mahi Mahi in Green Chili Coconut Broth, Mojo Pork and Shrimp Baked Onions are all on my list of recipe ideas for upcoming menus.  And, with cinnamon being one of my favorite spices, Snickerdoodle Cupcakes will certainly show up in my future baking projects -- how cute are they?!?


After narrowing it down to 6 or so options, I left the final choice up to Zach.  He chose the Coconut Shrimp with Curry Dipping Sauce, and boy am I glad he did!  This was a fantastic, easy dinner that was also delicious.  I can't wait to make it again.  The coconut crisped up beautifully and gave a great crunchiness to the shrimp, without having to be fried.  The curry sauce was super, it is definitely spicy, depending on your curry powder and preferences, I would start with half the amount and taste as you go, adding more to meet your personal taste level.  Ours turned out spicy, but I thought it was just right -- a hit of spice complemented the sweetness of the coconut and shrimp and balanced out nicely.  We already want this dish back on the menu, and next time we will probably defrost the shrimp overnight, then peel in the morning and let them sit in the coconut milk all day.  The 30 minute marinating time was a tight fit for a weeknight meal for us, especially since the rest of the dish is fairly labor intensive -- triple coating of the breading layers, so we thought it would be nice to save some time and make it that much easier to get on the table before we are starving.  We served it alongside red pepper couscous and steamed broccoli to turn it into a main course dish instead of an appetizer.


Coconut Shrimp with Curry Dipping Sauce
from Savor the Senses
serves 6 as an appetizer, 4 as a main course


Ingredients:


1 lb shrimp (peeled & deveined)
1 can light coconut milk
1 cup flour, divided
3 eggs
1 cup panko breadcrumbs
1 cup flaked coconut, unsweetened
6 tablespoons light mayonnaise
2 tablespoons light sour cream
1 tablespoon curry powder
1/2 teaspoon cayenne pepper


Directions:


  • Add the peeled and deveined shrimp and the coconut milk in a bowl.  Stir to coat all shrimp with coconut milk and then refrigerate for 30 minutes.  
  • Drain the milk from the shrimp and pat the shrimp dry with paper towels.
  • Preheat the oven to 400 degrees.  
  • Set up three bowls for breading the shrimp -- one with 1/2 cup flour, one with the 3 eggs, beaten and the last bowl with the panko, remaining 1/2 cup flour and coconut mixed together.  Working one at a time, dip the shrimp in the plain flour, then egg wash and finally the coconut and breadcrumb mixture.  Once breaded, arrange the shrimp in a single layer on a sheet pan.  
  • Bake shrimp until crispy and the coconut flakes start to turn golden brown, 15-20 minutes.  
  • While the shrimp are baking combine the mayo, sour cream, curry powder and cayenne pepper to make the dipping sauce.