foodie 1


Showing posts with label Cooks Illustrated. Show all posts

Wednesday, May 16, 2012

Perfect Sugar Cookies: SRC part 2!

As I said on Monday's post I couldn't pick just one recipe from Debby's blog A Feast for the Eyes!  I had to make these cookies.  As soon as I saw the title I was hoping it would be this exact recipe.  I had the same experience Debby did -- watching an episode of America's Test Kitchen and seeing these cookies and then immediately thinking "I NEED to make those."  So when I saw the recipe on her blog I knew I had to follow through.  The recipe is easy to follow, though you definitely have a few moments of 'Are you sure this is right?  Should it really look like this?" because of the odd mixing method -- melting the butter, no mixer needed, just whisking in ingredients, but trust me, it all works out!


These cookies are amazing.  Everyone needs to make these ASAP, not kidding.  I don't usually make proclamations like that, but these cookies are just that good.  They are crispy on the edges, soft in the middle and super, super flavor.  They are everything you ever dreamed a sugar cookie should be.  As we were eating our first cookie after making them, not even halfway through that first cookie, Zach said "Well, I guess we never have to look for another sugar cookie recipe ever again."  And I agree, 100%.  Yes, recipe fanatic, and cookbook collector that I am, know that this recipe is THE ONE for sugar cookies.  I will now have to go through my shoebox of recipes and toss out all other sugar cookie recipes, well, except for cut-out cookies, I'm still on the hunt for the 'perfect' cut-out cookie!


Perfect Sugar Cookies
from ATK/Cook's Illustrated November 2010, as seen on A Feast for the Eyes
makes 24-28 cookies


Ingredients:
2 1/4 cups all-purpose flour
1/2 teaspoon baking soda
1 teaspoon baking powder
1/2 teaspoon salt
1 1/2 cups sugar, plus 1/3 cup for rolling
2 ounces cream cheese, cut into 8 pieces
6 tablespoons unsalted butter, melted and still warm
1/3 cup vegetable oil
1 large egg
1 tablespoon milk
2 teaspoons vanilla extract


Directions:

  • Adjust oven rack to middle position and heat oven to 350 degrees. Line 2 large rimmed baking sheets with parchment paper or use silpats. Whisk flour, baking soda, baking powder, and salt together in medium bowl. Set aside.
  • Place 1 1/2 cups sugar and cream cheese in large bowl.  Pour warm butter over sugar and cream cheese and whisk to combine (some small lumps of cream cheese will remain but will smooth out later). Whisk in oil until incorporated. Add egg, milk, and vanilla; continue to whisk until smooth. Add flour mixture and mix with rubber spatula until soft homogeneous dough forms.
  • Measure 1/3 cup sugar into small bowl.  Use cookie scoop (#40, or about 2 tablespoon size) to portion out dough. Using hands, roll dough into balls. Working in batches, roll balls in small bowl of sugar to coat and evenly space on prepared baking sheet, 12 dough balls per sheet.
  • Using bottom of drinking glass, or bottom of measuring cup, flatten dough balls until 2 inches in diameter. Sprinkle tops evenly with remaining sugar from small bowl.
  • Bake, 1 tray at a time, until edges are set and just beginning to brown, 11 to 13 minutes, rotating tray after 7 minutes. Cool cookies on baking sheets 5 minutes. Using wide metal spatula, transfer cookies to wire rack and cool to room temperature.


Wednesday, April 25, 2012

Parmesan Risotto with Roasted Vegetables

This is one of our standard recipes, it makes an appearance on our menu at least once a month, if not every other week.  I can't believe I haven't posted it to the blog before now, but we're about to fix that!  This recipe is from The Best Light Recipe by America's Test Kitchen/Cook's Illustrated.  It never fails us and it's incredibly versatile.  We typically make up the base parmesan recipe, but we will throw in other cheeses if we have those lying around.  One of our favorite variations is to add in some of our homemade mozzarella cheese at the end instead of the parmesan.  Another great version is saffron risotto, which turns out a beautiful golden color (second picture), and I've included the directions for it as well.

We top this with any number of toppings -- seen here is roasted brussel sprouts, but any roasted veggie works just as well, asparagus, carrots, cauliflower, broccoli, butternut squash.  Sauteed zucchini or summer squash make a great summer meal as does grilled shrimp or chicken.  Halved cherry tomatoes or diced regular sized tomatoes, and chopped basil fresh from the garden with mozzarella makes a great caprese version.  Risotto can be a great vehicle for leftovers as well.  Mix in some leftover steak cut into bite-sized pieces, veggies, pork chops, really anything!


Parmesan Risotto
serves 6

Ingredients:
4 cups chicken broth
3 cups water
1 medium onion, chopped
1 tablespoon olive oil
salt
2 cups arborio rice
1 cup dry white wine
2 ounces grated parmesan cheese (about 1 cup)
1 tablespoon unsalted butter
ground black pepper

Directions:
  • In an electric kettle heat the chicken broth and water to boiling.
  • In a medium saucepan, heat the olive oil and add the onion and 1/2 teaspoon salt.  Cook over medium heat until the onion is softened.
  • Add the rice, stirring to coat all pieces with the oil.  Toast the grains until the edges start to turn transparent, about 4 minutes.  Stir in the wine and cook until completely absorbed, about 2 minutes.
  • Stir in 3 cups of the broth/water mixture.  Stir occasionally, until the liquid is absorbed, 10 to 12 minutes.
  • Continue to cook the rice, adding 1/2 cup of the broth/water mixture at a time and cooking until completely absorbed, about every 4 minutes.  Taste the rice starting after 10 minutes, cooking until al dente, with just some bite in the center.
  • Add in the butter, cheese and then season with salt and pepper to taste.  


Variation:  Saffron Risotto
  • Follow the recipe but omit the parmesan and add 1/8 teaspoon of saffron threads when you add the rice to the onions/oil.  

Wednesday, October 5, 2011

Triple Chocolate Cookies

I found this cookie recipe when flipping through a stack of my Cook's Illustrated magazines.  I knew I had to make them as soon as I saw them.  Like all Cook's Illustrated recipes, it was perfect.  Their recipes often involve steps that seem unnecessary at the time, but when you read the narrative and it is explained to you why included these steps you understand and take the extra time to make it right.  I have never had a recipe of theirs not turn out.  I may not like the particular combination of flavors, and might change up seasonings here or there, but the recipes pretty much always turn out flawless.  I do wish the same could be said for my pictures, but these were too good not to share because of a not-so-great picture.  The key is the three types of chocolate -- the melted chocolate in the dough, the cocoa powder and then the chips that are added in as well.  These cookies are ginormous.  You use an ice cream scoop to portion them out, and they spread quite a bit.  They really remind me of they kind you would buy at a bakery or in a store, giant and crispy on the edges but chewy in the middle. 

I am submitting this recipe to the Holiday Recipe Exchange hosted by Good Life Eats and My Baking Addiction to have a chance to win a gift basket from Scharffen Berger Chocolate, which actually is the brand I used when making these cookies.  Zach had gone to visit his brother in Hershey, Pennslyvania and brought me back several bars of their high quality chocolate for baking.  I'd love to win more for use in future recipes!  Come join the fun at the My Baking Addiction and GoodLife Eats Holiday Recipe Exchange sponsored by Scharffen Berger.


Triple Chocolate Cookies
Cook's Illustrated, September/October 1999

Ingredients:
2 cups unbleached all-purpose flour 
1/2 cup Dutch-processed cocoa powder
2 teaspoons baking powder
1 teaspoon table salt
16 ounces semisweet chocolate, chopped
12 ounces semisweet chocolate chips 
4 large eggs
2 teaspoons vanilla extract
2 teaspoons instant coffee powder
10 tablespoons unsalted butter, softened
1 1/2 cups packed light brown sugar
1/2 cup granulated sugar

Directions:
  • Sift first four ingredients together into a medium bowl and set aside.
  • Set up either a double boiler, or a medium pot filled with 3-4 inches of water with a metal bowl that will fit in the pot without touching the water.  Melt the chopped chocolate in the bowl, stirring until smooth.   Remove from heat and turn off burner.  
  • In a small bowl, beat the egg and vanilla together.  Sprinkle the coffee powder on top.  Set aside.
  • Using a stand mixer, beat butter until smooth and creamy, about 10 seconds.  Add in sugars and beat about one minute, mixture will still look granular.  Reduce speed to low and slowly add in egg/vanilla/coffee powder mixture.  Beat until incorporated, about another minute.  Add melted chocolate and additional chips in steady stream and beat another minute.  
  • Stop mixer and scrape bottom and sides of bowl.  Turn mixer on low and slowly add flour mixture.  Beat until just combined, do not overmix.  Cover bowl with plastic wrap and let stand at room temperature for 30 minutes, until fudge-like.  
  • Heat oven to 350 degrees.  Line cookie sheets with parchment (the parchment plays a key role later -- don't use a silpat!).  Scoop cookies onto cookie sheet using 1 3/4 inch ice cream scoop.  Leave 2, even 3, inches between each ball of dough. 
  • Bake for 10 minutes, reversing the cookie sheets halfway through baking.  The centers of the cookies will still be very soft-looking.  Cool cookies on sheets 10 minutes, then slide the parchment off the cookie sheet and onto the cooling rack.  Cover pans with new parchment and bake next set of cookies.  Once cookies are completely cooled, remove from parchment. 

    Friday, April 29, 2011

    Baked Chicken Parmesan

    This recipe definitely caught my eye the first time I flipped through ATK's Healthy Family Cookbook.  Chicken parmesan is delicious, but not great for you when it's fried.  A version that is baked and is easy for a weeknight meal -- awesome!  This is simple and fabulous.  I think it has a great balance of ingredients and the strips of basil on top really brings out a fresh flavor.  I went light on the sauce on mine, I don't like chicken parmesan smothered in tomato sauce -- the whole point is the crispy crunch of the chicken, right?


    Baked Chicken Parmesan
    serves 6

    Ingredients:

    1 1/2 cups panko bread crumbs
    1 tablespoon olive oil
    1/2 cup grated parmesan
    1/2 cup flour
    1 1/2 teaspoons garlic powder
    3 large egg whites
    1 tablespoon water
    vegetable oil spray
    6 boneless, skinless chicken cutlets, pounded 1/4 inch thick
    salt and pepper
    2 cups tomato sauce, warmed
    3/4 cup shredded mozzarella
    1 tablespoon chopped fresh basil


    Directions:

    • Preheat oven to 475 degrees.  
    • Combine the bread crumbs and olive oil in a non-stick skillet and toast over medium heat until golden.
    • Set up a breading station.  Let the toasted bread crumbs cool in a shallow dish, then mix in the parmesan.  Whisk the egg whites and water in a second bowl.  In a third bowl combine the flour and garlic powder.  
    • Place a wire rack over a baking sheet and spray with the cooking spray.  
    • Pat the chicken dry, season with salt and pepper.  Take one piece of chicken at a time through the breading stations -- first in the flour, patting off any extra flour.  Then coat in the egg whites, letting the excess drip off.  The last step us to coat with the toasted bread crumbs, making sure to pat them on to stick to the chicken evenly.
    • Place the coated cutlets on the wire rack, then spray with the cooking spray.  
    • Bake about 8-10 minutes or until any juices are clear.  You can also use a meat thermometer to check that the chicken reaches 160 degrees.
    • Top with desired amount of sauce and 2 tablespoons of the shredded mozzarella.  Bake until the cheese has melted, 3 to 5 minutes more.  
    • Sprinkle with basil and serve.  

    Wednesday, April 27, 2011

    Pork Lo Mein

    This dish is definitely a winner.  The standout element was buying and using the fresh lo mein noodles in the produce section of our grocery store.  In my store they are right near the refrigerated polenta and wonton/egg roll wrappers.  They were, I'm not kidding, revolutionary.  They are the square shaped noodles that you get in take out/restaurant lo mein.  I've made lo mein and other Chinese noodle dishes before and was never quite satisfied because the instructions would say to use regular spaghetti which isn't quite the same.  In fact this recipe also calls for regular spaghetti, but once i saw the fresh noodles in my store I knew I had to use them.  They make the dish more authentic and more like 'real' Chinese food.  Delicious.  If you have them available to you definitely use them.  I won't make stir fries or Chinese noodle dishes without them now.   


    So I've established that the noodles are amazing, but so were the other elements of this dish.  It was easy to put together and the leftovers tasted great for lunch the next few days.  I did adapt the vegetables used in the dish to suit our tastes, snow peas, bean sprouts and baby corns are what we like.  The original called for shiitake mushrooms and napa cabbage, but otherwise we left the spices and seasonings the same and it was great.  Not too spicy and not too salty.


    Pork Lo Mein
    Serves 6


    Ingredients:
    4 1/2 tablespoons soy sauce
    3 tablespoons oyster sauce
    3 tablespoons hoisin sauce
    1 1/2 tablespoons sesame oil
    1/4 teaspoon Chinese five-spice powder 
    1 pound pork tenderloin, halved then sliced into 1/8 thick strips
    3/4 cup chicken broth
    1 1/2 teaspoons cornstarch
    12 ounces spaghetti or fresh chinese noodles
    4 1/2 teaspoons canola oil
    6 tablespoons chinese rice cooking wine or dry sherry
    8 ounces snow peas
    8 ounces fresh bean sprouts
    15 ounce can of baby corn nuggets
    8 scallions, sliced thin
    1 tablespoon grated fresh ginger
    3 garlic cloves, minced
    1 teaspoon sriracha sauce


    Directions:

    • Mix the first 5 ingredients, through five-spice powder, together in a large bowl.  Measure 1/4 cup of the mixture into a separate bowl, then add the pork to the remaining mixture.  Stir to coat, then cover and refrigerate for 30-60 minutes.  Use this time to prep your vegetables if needed.
    • Whisk the broth and cornstarch into the remaining soy sauce mixture, set aside.
    • Cook noodles according to package directions, drain and leave in colander.  
    • Heat 1 1/2 tablespoons of the canola oil in a large dutch oven over high heat, until barely smoking.  Add half the pork and cook until lightly browned (but not cooked through), about 3 minutes.  Stir in 3 tablespoons of the wine and cook until evaporated.  
    • Transfer pork to a bowl, then repeat the process with another 1 1/2 teaspoons canola oil, remaining pork and 3 tablespoons wine.  Add this to the bowl as well.
    • Wipe the dutch oven dry with paper towels.  Add the last 1 1/2 teaspoons oil and heat over high heat until shimmering.  Add the snow peas and cook, stirring constantly, until crisp tender.  Add the baby corn and cook, stirring constantly, until warmed through.  Stir in the bean sprouts, scallions, ginger and garlic and cook about 30 seconds.  
    • Rewhisk the soy sauce/cornstarch mixture to combine, then add to the veggies.  Add the pork and any juices as well.  Bring to a simmer and cook until the sauce has thickened slightly and the pork is reheated.  Add the cooked noodles and sriracha, mix until combined and serve.  


    Monday, April 25, 2011

    Black Bean Burgers

    I picked this recipe to take a try at making some bean burgers from scratch.  I am a fan of the bean burgers you can buy from the frozen section at the grocery store, they have a nice southwest flavor and make for an easy, quick weeknight meal.  This homemade version is not as easy or quick, but it's got better flavor and I like knowing exactly what went into the patties.  You could probably make some up and freeze them to turn into future easy/quick meals too.  I did not try that this time, but I hope to next time.  Zach and I both really liked this recipe and we will make it again.  I liked the texture of the burgers.  Leaving some beans whole and mashing most of them made an almost creamy burger, and the spices were very delicious.  The only change I made was to add on a sauce.  I just took some cilantro and mixed it up with mayonnaise, a dash of cumin and a dash of cayenne.  


    Black Bean Burgers
    slightly adapted from America's Test Kitchen Healthy Family Cookbook


    Serves 6

    Ingredients:


    2 slices white sandwich bread
    2 15 ounce cans of black beans, rinsed
    2 large eggs
    3 tablespoons olive oil
    1 teaspoon ground cumin, plus more for sauce
    1/2 teaspoon salt
    1/8 teaspoon cayenne pepper, plus more for sauce
    1 red bell pepper, finely chopped
    1/2 cup minced cilantro, divided in half
    1 shallot, minced
    1/2 cup mayonnaise  


    Directions:

    • Heat oven to 350 degrees.  Place bread in food processor and pulse until you have coarse crumbs.  Spread crumbs on a baking sheet and toast in the pre-heated oven until light brown and dried out, about 10 minutes.  Let cool.
    • Measure 2 1/2 cups of the black beans into a large bowl and mash them until mostly smooth.  You can use a potato masher, pastry cutter or a fork.
    • In a separate bowl, beat the eggs with 1 tablespoon of the olive oil, 1 teaspoon of cumin, 1/8 teaspoon cayenne pepper and the salt.  
    • Add the egg mixture, cooled breadcrumbs, remaining 1/2 cup beans, bell pepper, 1/4 cup cilantro and shallot into the mashed bean mixture.  Mix until just combined.  Divide into 6 equal parts (about 1/2 cup each) and form into patties.
    • Heat 1 tablespoon oil in a large non-stick skillet over medium heat.  Place three of the patties in the skillet and cook until well browned on each side, 8 to 10 minutes.  Then repeat (including 1 more tablespoon oil) with remaining patties.  
    • While the patties cook mix the remaining 1/4 cup chopped cilantro with the mayonnaise.  Add cumin and cayenne pepper to your tastes.  I'd start with 1/8 teaspoon cayenne and 1/4 cumin then adjust as desired.  
    • Serve on toasted buns with sauce.   

    Thursday, April 14, 2011

    Spicy Honey Glazed Pork Chops

    This is one recipe we made from the Cookbook of the Month -- ATK's Healthy Family Cookbook.  This was a glaze recipe written for a pork loin roast, but we modified it to use on pork loin chops.  We buy a giant pork loin at the store and then cut it up into chops and a roast or two then freeze it.  You get a much better deal per pound when you buy in bigger quantities.  Plus, then we have lots of pork chops ready to go in the freezer to make for easy, quick weeknight meals.  Just defrost in the fridge overnight and you're ready to go!


    This recipe caught my eye because of the chipotle peppers.  They have such a great smokey heat and we like just about any recipe that uses them.  It only has 4 ingredients, 5 if you count the pork, and is super fast to put together.  The glaze would also be good on chicken and probably shrimp too.  We served the pork chops with a cilantro-lime couscous and it complemented the southwestern flavors of the glaze (as well as soaked up all the delicious juices).


    Spicy Honey Glazed Pork Chops
    adapted slightly from The America's Test Kitchen Healthy Family Cookbook
    Serves 2


    Ingredients:
    1 tablespoon olive oil
    2 pork loin chops
    salt and pepper
    1/4 cup honey
    2 tablespoons fresh lime juice, about 1 lime
    2 teaspoons minced canned chipotle chile in adobo sauce, about 1 pepper
    1/2 teaspoon cumin


    Directions:
    • Preheat a large skillet on medium to medium-high heat. Season the pork chops with salt and pepper. 
    • Add the oil to the pan, then when it shimmers add pork chops. Cook chops about 6 minutes per side, getting a nice sear/browning on each side. Remove the chops to a plate to rest. 
    • While they are browning add the honey, lime juice, chipotle and cumin to a small bowl, whisking to combine. 
    • Pour off any fat left in the skillet. Pour the glaze into the skillet and scrape any brown bits off the bottom. Simmer until slightly thickened. Add pork chops back into the skillet and coat them with the glaze. 
    • Serve, spooning extra glaze on top of pork chops.

    Tuesday, April 12, 2011

    Peanut Butter Cookies

    I know I promised some healthy recipes from America's Test Kitchen, but first a cookie recipe from the regular edition of Cook's Illustrated.  These cookies are amazing.  I will never have to look for another peanut butter cookie recipe, ever.  But, what else would I expect from a Cook's Illustrated recipe?  I don't know if I've yet discussed the mini-obsession I had with these magazines awhile back.  Zach and I went to an estate sale with my grandparents last Thanksgiving weekend.  We found a stack of old Cook's Illustrated magazines for sale and bought them all (30-40 issues) for 5 dollars.  FIVE DOLLARS!  A year's subscription is almost $30 and that's for 6 issues.  We hit the jackpot!  We had a few already, some of the free editions they send you when you ask for a trial issue, and one of Zach's co-workers had given him a few as well.  So, we knew how great and amazingly reliable the recipes are.

    Soon after returning home from our holiday trip I started searching for other back issues on eBay.  I figured I'd see if I could get a few cheaply to round out/fill in some gaps in what we had already bought, then we'd have a nice collection.  I ended up obsessively searching for magazines until I had them all.  For the record, early editions are the hardest to find.  Not Issue One since they must have put that back into circulation at some point, or used that as their 'trial copy' for a bit since there are tons of Issue One's out there (try an eBay search, you'll see) but in the range of 5-20ish, those are the tough ones to find.  Zach has gotten me a subscription for my birthday the past two years, so I now have the complete collection, 1-110 and counting!

    But, back to the recipe.  I made these to send off to a soldier for Operation Baking GALS last October.  I saw Beantown Baker post about it on her blog, and I had a few cookie recipes that I couldn't stop thinking about.  I had spent hours recently flipping through each one of my 110 Cook's Illustrated to create my '30 while I'm 30' list.  So, while peanut butter cookies didn't make the cut, if they had, this recipe would be the only one I would need.  The only changes I made were to use smooth peanut butter and omit the ground peanuts.  I love peanut butter flavor, but not actual peanuts.  I know, I'm weird like that; though, peanuts are starting to grow on me. 


    Peanut Butter Cookies
    from Cook's Illustrated, March/April 1998
    Makes approximately 3 dozen cookies

    Ingredients:
    2 1/2 cups flour
    1/2 teaspoon baking soda
    1/2 teaspoon baking powder
    1 teaspoon salt (if using salted butter use 1/2 teaspoon)
    1/2 pound butter, unsalted, room temperature
    1 cup firmly packed brown sugar
    1 cup granulated sugar
    1 cup peanut butter, smooth or crunchy
    2 large eggs, room temperature
    2 teaspoons vanilla extract
    1 cup roasted salted peanuts, ground in food processor to resemble bread crumbs (I omitted.)

    Directions:
    • Preheat oven to 350 degrees. 
    • Into a medium bowl, sift together flour, baking soda, baking powder and salt. 
    • Using your electric mixer, beat butter until creamy.  Add the granulated and brown sugar and beat until fluffy.  Add peanut butter and beat until incorporated, scraping down the sides of the bowl as needed.  Add eggs one at a time, then vanilla.
    • Add the sifted dry ingredients into the wet ingredients.  Mix gently until just incorporated.
    • Scoop out 2 tablespoons of dough at a time.  Roll into large balls and place them 2 inches apart on a baking sheet lined with parchment.  
    • Fill a glass with cold water.  Use a fork to make the criss-cross pattern in the top of the cookie, dipping the fork into the cold water between pressings.  
    • Bake cookies until they are slightly brown on the edges and puffed up, 10 to 12 minutes.  
    • Give the cookies about 5 minutes to set on the cookie sheets before transferring to wire racks to cool completely. 

    Sunday, April 3, 2011

    Cookbook of the Month: April 2011

    I haven't had a cookbook of the month in awhile.  I started it last year sometime then as life got busy it got abandoned.  But I'm bringing it back. Just call me Justin Timberlake. 


    So for April 2011 my cookbook of the month will be America's Test Kitchen Healthy Family Cookbook. I was super excited when this cookbook showed up in stores.  I buy most of my books at Costco -- it's almost impossible for me to leave there without a book.  We've recently acquired an iPad though so I think my physical books purchases will be declining in favor of ebook purchases. Not cookbooks though; I suspect I will always buy those in actual book form.  But, when I saw that the newest ATK book included nutritional information I was quite excited.  That was my biggest complaint about their products for awhile -- obviously not a major gripe since I'm still a subscriber and managed to procure all back issues to make a complete set of Cook's Illustrated editions.  But, since I knew that science is a main tenant of their recipe creation I always wondered why they didn't include nutrition info in their recipes.  I figured for a publication as into food science as they are it was surprising that they would not include those statistics.  


    Anyway, this book solved that problem so I bought it immediately.  We've enjoyed just about everything we've made out of it and we've barely scratched the surface.  Look for at least three recipes this month from America's Test Kitchen's Healthy Family Cookbook.


    Wednesday, July 14, 2010

    Velveted Chicken Stir-Fry

    When we got snow peas in our CSA box our first thought was a stir-fry.  I went right to my collection of Cooks Illustrated magazines to study up on the best techniques.  I love Cooks Illustrated for this reason - they painstakingly research every aspect of a recipe so I know it's going to be the best.  If it's not good, chances are I screwed up somehow and it's not the recipe's fault.  So, after reading through a few issues and learning a few pointers and techniques we were ready to make our own stir-fry.  They say a non-stick skillet is actually the best for stir-frys, not a wok.  They also introduced me to the traditional Chinese technique of velveting chicken -- coating chicken pieces in a cornstartch and egg white or oil mixture then parcooking in moderately heated oil.  It really gave the chicken a more authentic texture and flavor.  It was moist, juicy and delicious, not dry or overcooked like stir-frys I have made in the past.  I worked off the recipe for the velveted chicken, but we used the veggies we wanted.  The snow peas were the original basis for the dish.  We saw some great eggplant at the farmer's market we thought would match well.  When we were at the market we also picked up some baby bok choy, garlic scapes and scallions.  Next time I might do either scapes or scallions, but otherwise I think it turned out pretty well. 


    Gingery Stir-Fried Chicken with Vegtables
    from Cooks Illustrated, May/June 2004

    Ingredients:

    for Marinated Velveted Chicken:
    1/4 cup soy sauce
    1/4 cup dry sherry
    1 cup water
    1 pound boneless, skinless chicken breasts, thinly sliced
    2 tablespoons sesame oil
    1 tablespoon cornstarch
    1 tablespoon flour

    for stir-fry:
    1/4 cup chicken broth
    2 tablespoons dry sherry
    1 tablespoon soy sauce
    1 tablespoon hoisin sauce
    1/2 teaspoon sesame oil
    1 teaspoon cornstarch
    1 teaspoon sugar
    1/4 teaspoon red pepper flakes
    4 teaspoons minced fresh ginger (about a 1 1/2 inch piece)
    1 medium garlic clove, minced
    peanut or vegetable oil
    1 recipe of Marinated Velveted Chicken
    2 heads of baby bok choy, cut on bias in 1/2 inch strips
    1 small eggplant, cut into 1 inch cubes
    3 scallions, cut into 1 inch pieces
    1 bunch of garlic scapes (8-10), cut into 1 inch pieces

    Directions:

    For Marninated Velveted Chicken:
    • Combine soy sauce, sherry and water in medium bowl.  Add chicken and stir to coat.  Cover with plastic wrap and refrigerate for at least 20 minutes and up to 1 hour.
    • Immediately before using mix sesame oil, cornstarch and flour in medium bowl until smooth.  toss chicken in cornstarch/flour mixture until evenly coated.  
    For Stir-Fry:
    • Whick broth, sherry, hoisin sauce, sesame oil, cornstarch, sugar, pepper flakes and 2 teaspoons ginger in small bowl; set aside.  Combine remaining 2 teaspoons ginger, garlic, and 1 teaspoon peanut oil in small bowl; set aside.
    • Heat 2 teapoons peanut oil in 12-inch non-stick skillet over high heat until smoking.  Add half of chicken to skillet, making sure to not overcrowd the pan.  Cook without stirring but separating pieces if needed until gold brown on first side, about 1 minute.  Turn chicken pieces and cook until lightly browned on second side, abotu 30 seconds.  Transfer chicken to clean plate, repeat with more oil and the rest of chicken.
    • Add 1 tablespoon peanut oil to empty skillet, heat until just smoking.  Add bok choy; stir-fry until crisp tender, remove to clean bowl.  
    • Add 1 tablespoon peanut oil to empty skillet, heat until just smoking.  Ad eggplant; stir-fry until browned on all sides, 2-3 mintues.  Remove to bowl with bok choy.
    • Add 1 tablespoon peanut oil to empty skiller, hear until just smoking.  Add scapes and scallions; stir-fry until crips-tender.  Push to sides of skillet.  
    • Add garlic/ginger mixture to center of skillet and cook, mashing with a spoon until fragrant, about 30 seconds.  Stir mixture into scallion/scape mixture and cook about 30 seconds longer.
    • Stir in bok choy pieces and eggplant, then add chicken back to skillet as well.  Whisk sauce to recombine and then add sauce to skillet.  Reduce heat to medium and cook stiring constantly until sauce is thickened and chicken is cooked through.  Serve immediately.

    Monday, July 12, 2010

    Potato Salad with Bacon and Balsamic Vinager

    I came across this recipe while looking for something to make with the new potatoes from our CSA box.  Cooks Illustrated was the first place I turned since they always have reliable and delicious recipes, not to mention a great amount of knowledge on ingredients.  I read through a "Primer on Potatoes" to see what I could learn about new potatoes.  They recommended using new potatoes as you would any waxy potatoes, and so I decided on potato salad.  I didn't want to make a traditional mayonnaise potato salad since that style has never appealed to me, and Zach doesn't like mayo all that much.  We both love balsamic vinegar though, so we quickly decided on this recipe; plus, it had bacon.  Finding bacon as an ingredient pretty much seals the deal for me.  This was quite tasty.  It had a nice bite from the vinegar, and it paired very well with the new potatoes.  A nice change if you are bored of the same old potato salad.


    German-Style Potato Salad with Bacon and Balsamic Vinegar
    from Cooks Illustrated, July/August 1994
    Serves 6

    Ingredients:
    2 pounds new potatoes, rinsed and scrubbed
    1/4 cup balsamic vinegar
    1/2 teaspoon salt
    1/2 teaspoon ground black pepper
    6 slices bacon, cut into 1/4 inch strips
    1 medium onion, cut into medium dice
    1/2 cup beef broth
    1/4 cup fresh parsley, minced

    Directions:
    • Place potatoes in a 4 to 6 quart pot; cover with water.  Bring to a boil, cover and simmer, until tender (15-20 minutes for new potatoes)Drain, cool potatoes slightly and cut into 1/4 inch slices.
    • Layer warm potato slices in a medium bowl; sprinkle with 2 tablespoons vinegar and the salt and pepper as you go.  Let stand at room temperature while preparing dressing.
    • Fry bacon in a medium skillet over medium heat until bacon is brown and crisp, 7-10 minutes.  Transfer bacon pieces to bowl of potatoes.
    • Add onion to bacon drippings and saute until softened, 4-5 minutes. Add beef broth and bring to a boil, add remaining 2 tablespoons vinegar.
    • Remove from heat and pour mixture over potatoes.  Add parsley and toss gently to coat.  Serve warm. 

    Sunday, November 22, 2009

    November/December Cookbook of the Month

    So, I've been a bad blogger, a very bad blogger.  November has been a crazy month, and we haven't even hit Thanksgiving yet!  I had two weeks at work where I had to stay each night, and if I stay late, the traffic increases and my evening commute lengthens from just over an hour to almost two hours.  Yeah, not fun.  So, those nights have been devoid of trying any new recipes and filled with leftovers, frozen pizzas and quick non-recipe meals -- quesadillas, rice and beans, nothing good to really blog about.  I like my entries to be something I tried for the first time, or an old favorite, but I like them all to be actual recipes, not general, anyone-can-throw-this-together-kind-of-food.  Also in November was my birthday - yay!  Which also resulted in a string of meals out at restaurants.  I will blog one of those visits soon, to Vintage 50, which was amazing, but back to the point of this post, we haven't been doing too much blog-worthy cooking lately in our kitchen and it's time to fix that.  Of course I say this as we are about to leave town for Thanksgiving, but since we also tend to do a decent amount of cooking at my parent's house, I'll be sure to take any pictures for new entries.

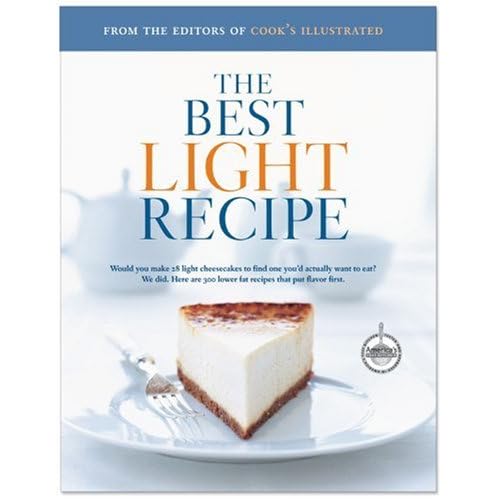
    As a result of the craziness of November, I won't be able to get three recipes out of my cookbook of the month choice, partially because of time, and partially because it was so hard to pick just three!  So, I'm making it a double month book and will try for 5 or so between November and December.  I've chosen The Best Light Recipe, by the fine folks at Cook's Illustrated.  I love their extensive testing of recipes to determine what really is the 'best' version of something.  Also, Zach just got me a subscription to the monthly magazine as part of my birthday present, so look for some of their regular recipes too!