I'm so excited to be writing this blog post! I'm participating in a Virtual Baby Shower for a very special lady on a cooking message board I frequent. I've seen many of these 'virtual showers' in the past, but this is the first time I've been asked to participate in one and I couldn't be more honored. Jessica from The Jey of Cooking is due in one month with her second child -- a baby girl! Joelen, of What's Cookin' Chicago?, put this fabulous event together and came up with a ballpark theme. Jessica, her husband and little boy/future big brother live in Chicago and are HUGE Cubs fans so ballpark food is perfect for this lovely occasion.

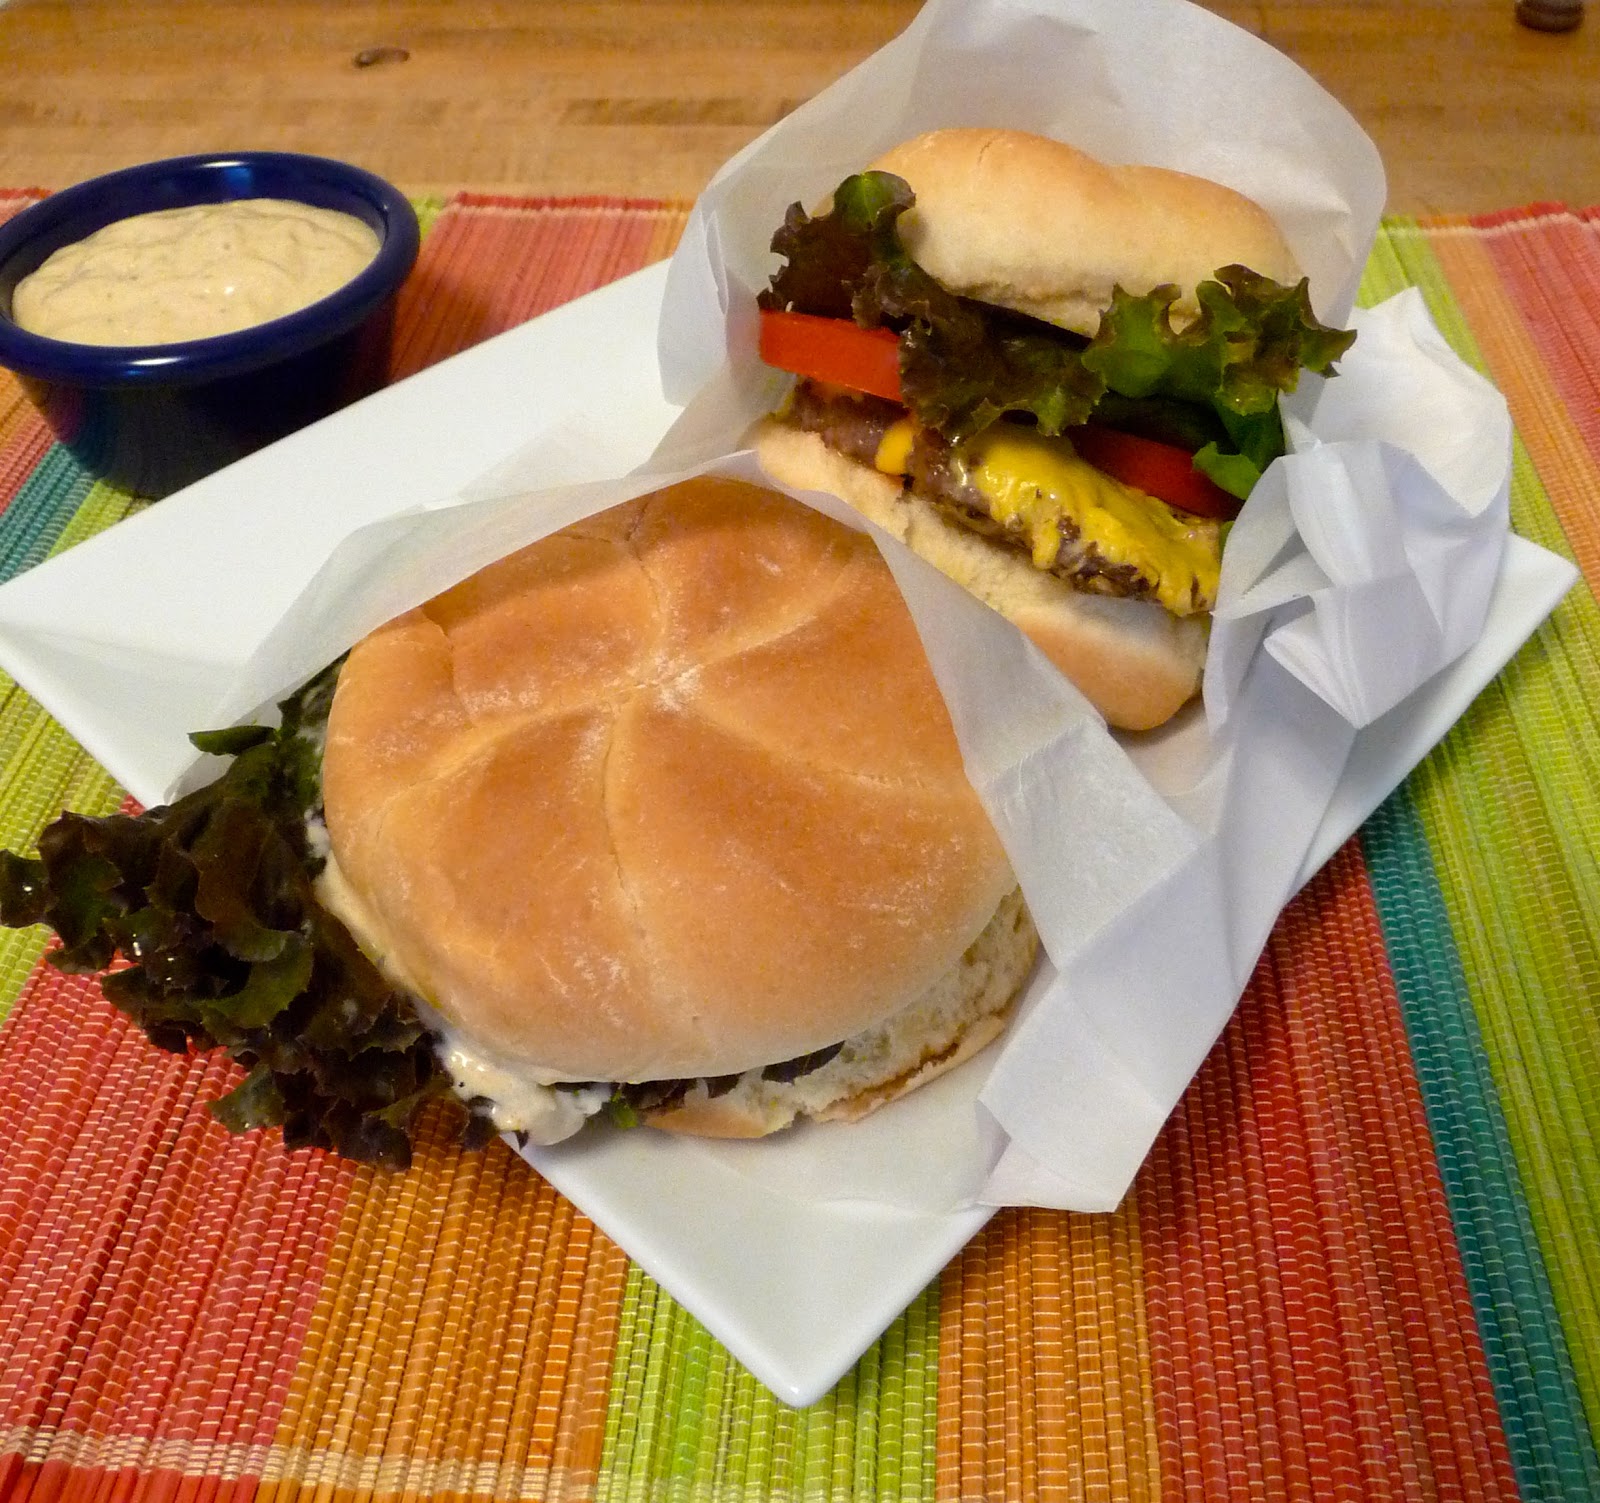
I figure Chicago style hot dogs are probably the ballpark food-of-choice at Wrigley Field, so I decided to create something that is a popular stadium item in our town -- The Shake Shack Burger. We've only been to one game at Nationals Park, but it was just after Shake Shack opened and it was very popular. We got there early to avoid the long lines and were so happy we did. The Shack Burger lived up to all the hype we had heard about it. It was salty and crunchy and the shack sauce just made the fresh tomatoes and lettuce sing. So, recreating this burger at home was the first thing that popped into my head when I learned about the ballpark theme.
Some googling led me to an article on Serious Eats with a very detailed recreation of the Shack Burger. I took a few shortcuts, mostly for convenience sake, but found it came out pretty darn close to the original! It was just as tasty, and though I didn't figure out the cost, I am sure it was cheaper! We used ground beef we already had, 85% lean, instead of grinding our own and used some potato rolls we already had, which weren't Martin's brand, but still very good! I accidentally bought red leaf lettuce instead of green, but that made no difference in the taste at all.
I'm very thrilled to share my contribution to the All-Star Virtual Baby Shower for Jessica! She's a smart, funny gal who is always sharing an encouraging word or bit of advice in our cooking community and I'm so happy to be a part of this online celebration of her new little girl!
Shake Shack Burgers
from Serious Eats
makes 4 burgers
Ingredients:
1/2 cup mayonnaise
1 tablespoon ketchup
1 tablespoon yellow mustard
4 slices kosher dill pickle, roughly chopped
1/4 teaspoon garlic powder
1/4 teaspoon paprika
Pinch cayenne pepper
1 pound ground sirloin, 85% lean
1 tablespoon butter, softened
4 burger rolls, preferably potato
4 leaves of green (or red!) leaf lettuce, tops of leaves only
8 slices ripe plum tomatoes, center-cut prefered
1/2 teaspoon vegetable oil
Kosher salt and fresh-ground black pepper
4 slices yellow American cheese
Directions:
- Make Shack Sauce -- combine mayo, ketchup, mustard, chopped pickle, garlic powder, paprika and cayenne in the bowl of a food processor. Give the processor a few good whirls, until the sauce looks to be an even consistency, scrapping down the sides of the bowl if necessary. This will make almost 3/4 cup sauce and you will have some leftover after dressing the burgers. It's great for dipping fries.
- Next form the ground beef into 4 pucks -- about 2 inches high and 2 1/2 inches wide. Sprinkle the top side heavily with salt and pepper.
- Prep a large stainless steel skillet -- using a wadded up paper towel rub vegetable oil on skillet, then place over medium-high heat until just beginning to smoke.
- While waiting for the skillet to heat, turn broiler on high. Open the buns, but do not split all the way through, leave them 'hinged' open if possible. (My rolls were already split and my burgers still turned out fine, so it's okay if this happens to you as well.) Spread the softened butter over the tops and bottoms of all 4 rolls. Place under the broiler and cook until golden brown.
- Once the buns come out of the broiler, dollop 1 -2 teaspoons (depending on preference) on each side of each bun. On the top bun, add one leaf lettuce then 2 tomato slices. Set prepped buns aside to wait for burgers.
- When skillet is barely smoking, place beef patties in, seasoned side down. Using the back of a spatula, flatten the patties to 4 inches wide. Normally this is a no-no, but for a realistic Shack Burger you want the beef to stick and get 'crusty' for lack of a better term. Season the top side with salt and pepper. Cook until crisp crust forms, about three minutes.
- Flip burgers and top each with one slice American cheese. Cover and cook until cheese melts.
- Transfer patties to bottoms of burger buns and cover with toppings and bun tops. Wrap in parchment paper if desired and let sit for 1-2 minutes. I find this step, while annoying since delicious burgers and their mouth-watering smells are surrounding your surely hungry taste buds, essential. It really lets the juices from the burgers sink into the buns and the sauce to meld with the other toppings and cheese to do the same. We found it easier to cook two burgers at a time in our skillet, so it was easy to let the first set sit in parchment while we finished off the second two burgers, then ate the first set.
So, I'm trying to get back into the swing of things with blogging and I thought this would be a great recipe to do so. I added the newest BAKED book to my Amazon wishlist as soon as I read about it on BAKED's Facebook page. I was ordering part of Zach's birthday gift and needed an excuse for the familiar Amazon packaging to arrive at the house, so into my shopping cart went BAKED Elements. I love it! It's got the same humor and great stories/explanations behind each recipe and it's organized into their top ten favorite ingredients. I know the Pumpkin chapter will get a lot of use this fall and the Booze chapter is always a place to look for a delicious treat. In fact, Zach chose his birthday cake from the Booze chapter. Cinnamon is a favorite ingredient of mine, and about the only chapter I think we will skip is the Banana chapter (we both despise bananas).
So when BAKED Sunday Mornings decided to start baking along with this book and Brooksters was the first recipe I was very excited to jump back in with the group and bake-along. I made one modification to my Brooksters, deciding to make them in a mini loaf pan, since the book cautioned against dark metal pans and both of my cupcake tins are dark metal. My mini loaf pan is Williams-Sonoma Gold Touch, so I thought that would be a better option. I was wrong. The shape was all wrong and by the time the tops of the cookie were fairly dark brown, the insides were still pretty gooey. I don't mind as much as some people might, since I like things on the gooey-side but it was not ideal. Oh well, next time we'll give the cupcake pan a try and see how it works out that way. We did end up almost two dozen balls of cookie dough leftover after making the Brooksters, which we scooped out in 2 Tablespoons balls and froze, so now we can have fresh chocolate chips cookies whenever we want - yum!
Despite their textural flaws, these tasted amazingly delicious. The cookie dough was buttery and spot-on, the brownie was decadent and rich. Combined they are much more than the sum of their parts.
To get the recipe for Brooksters, and to join along with the group, head on over to BAKED Sunday Mornings!
Hi all! So in my last Secret Recipe Club post I mentioned moving and buying a house which is the reason I haven't posted since the last SRC! We're all moved in and spent an afternoon signing my name more times that I have total in my life up to that point, so we are officially homeowners! Yay! Here's where we now call home:

But, on to my recipe. This month I was assigned Gluten Free from A to Z by Judee. My family doesn't eat gluten-free, so a lot of the substitutions and different ingredients were really interesting for me to read. I chose a recipe that would be super helpful now that I am back to school. I'm a teacher here in Northern Virginia, I don't know if I've ever mentioned that specifically on the blog, so well, now I have! Now that I'm back to setting an alarm (ugh) and getting myself together and out the door quickly (double ugh) it's very convenient to have quick and easy breakfasts. I made these egg cups on a Sunday evening and then was able to enjoy them throughout the week. They are infinitely customizable and very little effort. We did sauteed spinach, red onion, colby jack cheese and hatch chiles and they are delicious!
Easy Egg Cups
from Gluten Free from A to Z
makes 12 cups
Ingredients:
6 ounces spinach
6 eggs
1 cup milk
salt
pepper
1/4 cup red onion, diced
1/4 cup hatch chiles, diced
1/2 cup shredded colby jack cheese
Directions:
- Preheat oven to 350 degrees.
- Heat a large non-stick skillet over medium heat. Spray with cooking spray and add in the spinach. Stir and allow to wilt down.
- While the spinach is wilting, in a medium bowl whisk together eggs and milk. Season with salt and pepper.
- Start building your egg cups -- Spray a 12-cup muffin tin with cooking spray. Put about a teaspoon of red onion in each muffin tin, then follow with a teaspoon of chiles. Sprinkle two teaspoons of cheese on top of the onion and peppers.
- Once the spinach has wilted distribute it evenly into the 12 muffin tins. Pour the egg mixture into each tin, distributing evenly. I transferred the egg mixture to a 2 cup pyrex measuring cup (the kind with a spout) to make this step easier.
- Bake for 20-25 minutes, until the center is set.


.JPG)